| 1. |
Download and Run TeamViewer 11 Host. |
Download |
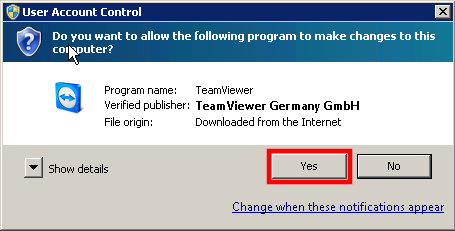
| 2. |
On the UAC prompt, click on ‘Yes’ or ‘Accept’. |
 |
| 3. |
On the Welcome screen, click on ‘Next’. |
 |
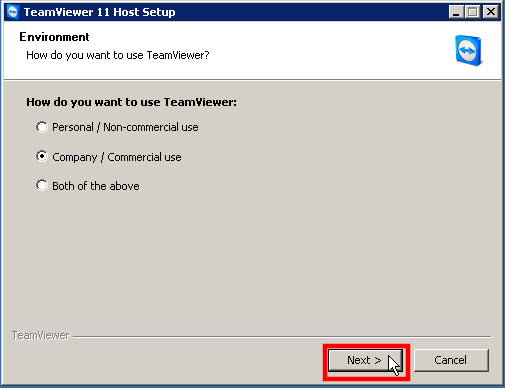
| 4. |
On the Environment screen, select ‘Company / Commercial user’, then click on ‘Next’. |
 |
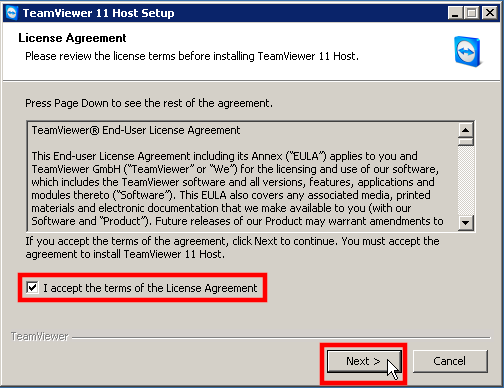
| 5. |
On the License Agreement screen, click check the box to accept the terms of the license, then click on ‘Next’. |
 |
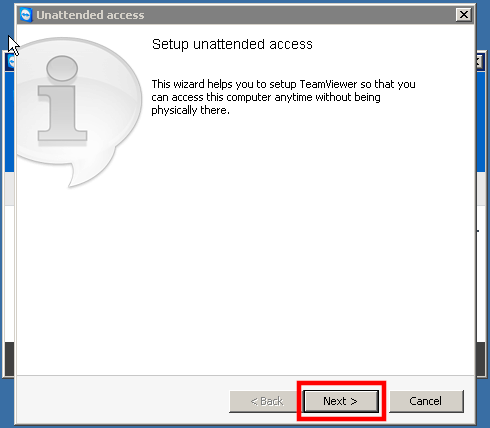
| 6. |
When the install has completed, a prompt for Unattended access will show. Click on ‘Next’. |
 |
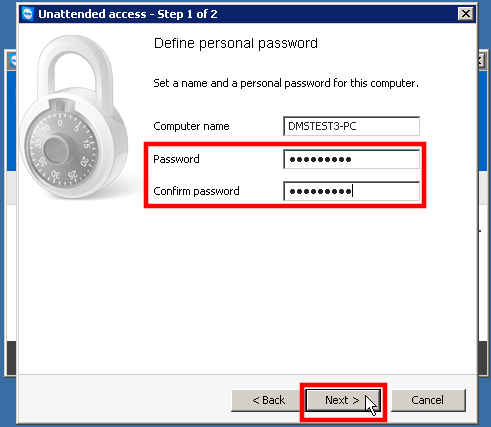
| 7. |
On step 1 of the Unattended access setup, a prompt to set the remote access password will show. Enter the password you want to set and confirm the password, then click on ‘Next’. |
 |
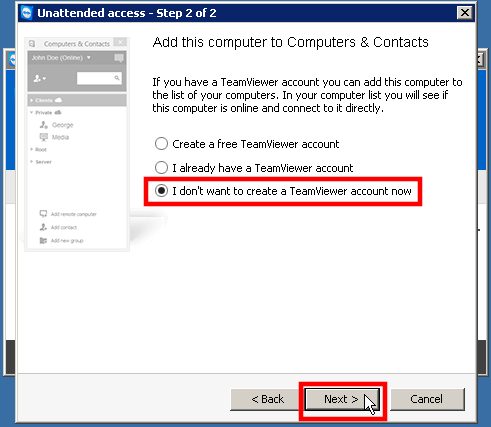
| 8. |
On step 2 of the Unattended access setup, a prompt to add the computer to account will show. Select ‘I don’t want to create a TeamViewer account now’, then click on ‘Next’. |
 |
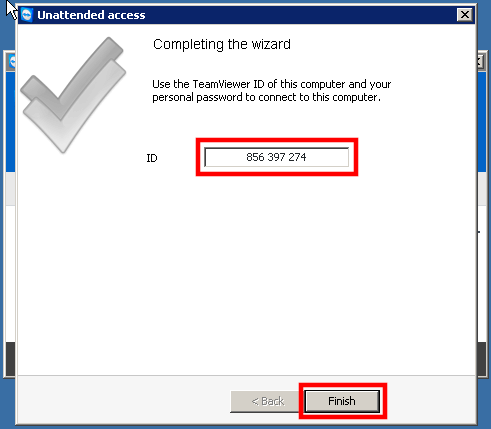
| 9. |
On step 3 of the Unattended access setup, the computer’s ID number will show. Make a note of this ID number. The ID number and password set in step 7 are needed to access this computer remotely. To close the screen, click on ‘Finish’. |
 |